Roofing Rollformers: What to Do After Installing a New Coil
Roofing Rollformers: What to Do After Installing a New Coil
If you are using a roofing rollforming machine, it is important to understand the rules of correct operation. A crucial part of every rollforming line is the initial feeding of the material into the machine. In today’s article, we would like to specifically cover this topic: what to do after you have installed the coil on your decoiler and are ready to feed it into the machine. We will go over this process step by step, from the very beginning to the moment where your machine is producing the roofing panels automatically, with minimal operator intervention.
Let’s start with the first step:
- Step One – Metal Preparation

Before starting any work on your roofing rollformer, prepare a test sheet of metal. Usually, I use a sheet around 4–6 feet long. That is enough to get a full picture of the profile configuration, as well as the machine setup for proper rollforming machine setup.
After that, cut the corners on your sheet. This will ensure smooth feeding and reduce the risk of jamming during the coil feeding process.
For this step, I use regular metal snips.
- Step Two – Width Adjustment
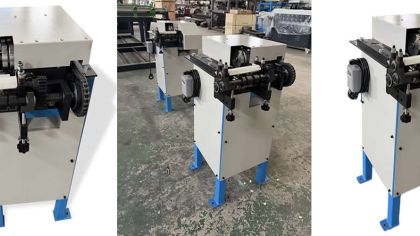
Once we have a sheet of metal prepared and ready to be fed, we can move on to adjusting the width on the feeding table of the machine. For today’s article, I will write about the adjustment process on the SS4E-Pro rollformer.
On the SS4E-Pro rollforming machine, you can adjust the width by moving the right side of the machine. If you take the top covers off the machine, you will see four shafts connected to the right rack. Each of those shafts is secured to the rack via two screws. To adjust, follow the next steps:
- Loosen the screws on each of the shafts (use an Allen key size 4)
b. Loosen the black handles underneath the right side of the feeding table
c. Turn the crank handle on the side of the machine to change the width of the machine (turn clockwise for a wider setup and counterclockwise to narrow the machine)
Place your metal sheet on the feeder and adjust the width of the feeding table according to the metal. Make sure to leave a 1/16” gap between the metal and the limiters on the feeding table for proper clearance in roofing panel production.
- Step Three – Manual Jog
Once the machine width is set up, you can move forward by choosing manual mode on your tablet/remote controller. Slowly jog the metal forward, inspecting the result after each forming station passes during rollforming machine setup.
What to look out for:
- The right side of the machine consists of two separate racks. When the metal is approaching the second rack, inspect the alignment of the racks carefully
b. If your machine produces a profile with a slotted flange, it is equipped with a perforation roller. When the metal passes the perforation roller, ensure that it moves smoothly and does not get stuck in the perforation teeth
Once the metal reaches the shearing scissors, it is time to move on to the next step.
- Step Four – Shearing Scissors Inspection
In the shearing scissors, inspect die alignment. Jog the metal forward slowly to confirm it fits properly into the shearing dies. If needed, adjust accordingly.
After that, make a sample cut and check whether the shearing scissors tear or significantly dent the panel during roofing panel production.
- Step Five – Panel Inspection
For this step, continue jogging the panel forward until it exits the machine.
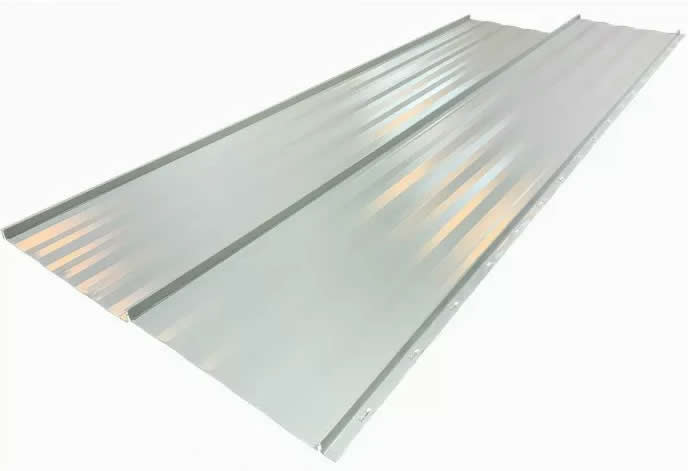
Now you can see the panel configuration clearly. Please note that it is better to inspect the configuration in the middle of the panel, as the first and last several inches may vary since the material is not fully stabilized by the rollers at entry and exit in a roofing rollforming machine.
If the configuration of the panel is acceptable, you can proceed with feeding the metal from the coil into the machine.
- Step Six – Coil Feeding
For the final step, use manual mode until the panel exits the machine. Press forward until around 10 inches of metal exits the machine. Now you can make a cut and switch to automatic mode in your roofing rollforming machine.
And just like that, your machine is now producing roofing panels of the correct length and quantity automatically and consistently.
Thank you for reading this article, and feel free to reach out to us for more information:
Email – info@stangroup.ca
Phone – 204-698-5910